Kubernetes Response Engine, Part 5: Falcosidekick + Argo
This blog post is part of a series of articles about how to create a
Kubernetesresponse engine withFalco,Falcosidekickand aFaaS.See other posts:
- Kubernetes Response Engine, Part 1 : Falcosidekick + Kubeless
- Kubernetes Response Engine, Part 2 : Falcosidekick + OpenFaas
- Kubernetes Response Engine, Part 3 : Falcosidekick + Knative
- Kubernetes Response Engine, Part 4 : Falcosidekick + Tekton
- Kubernetes Response Engine, Part 6 : Falcosidekick + Cloud Run
- Kubernetes Response Engine, Part 7: Falcosidekick + Cloud Functions
The Open Source ecosystem is very vibrant, there are many ways to create a Kubernetes Response Engine based on our dynamic duo, Falco + Falcosidekick.
Today, we will use two components of the CNCF project Argo:
Argo Events, will receive events fromFalcosidekickand push into it event bus.Argo Workflow, will listen the event bus and then trigger the workflow if certain criteria are encountered.
Like we did for previous examples with Kubeless, OpenFaas and Knative, we'll address the situation where a shell is spawned in a pod and we want to remediate that by deleting it.
This is how we will set this up:
┌─────────────┐           ┌─────────┐          ┌────────────────┐
│             │  detect   │         │  push    │                │
│  pwned pod  ├───────────►  falco  ├──────────► falcosidekick  ├────┐
│             │           │         │          │                │    │
└──────▲──────┘           └─────────┘          └────────────────┘    │ notify
       │                                                             │
       │                                                             │
delete │   ┌──────────────┐          ┌───────────────┐        ┌──────▼──────┐
       │   │              │          │               │        │             │
       └───┤ deletion pod ◄──────────┤ argo workflow │        │ argo events │
           │              │  create  │               │        │             │
           └──────────────┘          └────────────▲──┘        └─┬───────────┘
                                                  │             │
                                          trigger │             │ push
                                                  │             │
                                                ┌─┴─────────────▼──┐
                                                │       bus        │
                                                └──────────────────┘
Requirements
We require a kubernetes cluster running at least 1.17 release, helm and kubectl installed in your locale environment.
Installation of Argo Events
We simply follow the official documentation.
kubectl create namespace argo-events
kubectl apply -n argo-events -f https://raw.githubusercontent.com/argoproj/argo-events/stable/manifests/install.yaml
kubectl apply -n argo-events -f https://raw.githubusercontent.com/argoproj/argo-events/stable/manifests/install-validating-webhook.yaml
kubectl apply -n argo-events -f https://raw.githubusercontent.com/argoproj/argo-events/stable/examples/eventbus/native.yaml
Installation of Argo Workflow
Again, the official documentation will help us.
kubectl create namespace argo
kubectl apply -n argo -f https://raw.githubusercontent.com/argoproj/argo-workflows/stable/manifests/install.yaml
kubectl patch -n argo cm workflow-controller-configmap -p '{"data": {"containerRuntimeExecutor": "pns"}}'
The kubectl patch is there for allowing the workflows to run in minikube, kind, etc. See docs about Workflow Executors to learn more about.
After a while, you should have access to Argo Workflow UI through a dport-forward:
kubectl port-forward svc/argo-server -n argo 2746:2746 &
The link is https://localhost:2746 (you can ignore the certificate error, we're in a lab 😉).
Creation of the Event Source
We'll use an Event Source with Webhook type. It will receive Falco events from Falcosidekick and push them then into the Event Bus.
This component is pretty easy to understand. Falcosidekick will have to POST the events to an endpoint /falco of a service opened on port 12000. Easy.
cat <<EOF | kubectl apply -n argo-events -f -
apiVersion: argoproj.io/v1alpha1
kind: EventSource
metadata:
  name: webhook-falco
  namespace: argo-events
spec:
  service:
    ports:
      - port: 12000
        targetPort: 12000
  webhook:
    # event-source can run multiple HTTP servers. Simply define a unique port to start a new HTTP server
    falco-event:
      # port to run HTTP server on
      port: "12000"
      # endpoint to listen to
      endpoint: /falco
      # HTTP request method to allow. In this case, only POST requests are accepted
      method: POST
EOF
As expected, we now have a new service which will listen events from Falcosidekick on port 12000 and endpoint /falco:
kubectl get svc -n argo-events

NAME                            TYPE        CLUSTER-IP      EXTERNAL-IP   PORT(S)                      AGE
webhook-falco-eventsource-svc   ClusterIP   10.43.117.26    <none>        12000/TCP                    11m
Creation of the Sensor
In Argo Events architecture, Sensors are responsible for listening to the Event Bus and triggering something should the criteria we set match.
In our case, our Sensor:
- listen only events for pushed by webhook-falco
Event Source - consider only events where the body (in JSON) contains the value Terminal shell in container for field with key rule, we want to match for only this Falco rule in one word.
- trigger a workflow based on a template with our event as input
First, create the Service Account which allows our Sensor will.
cat <<EOF | kubectl apply -n argo-events -f -
apiVersion: v1
kind: ServiceAccount
metadata:
  namespace: argo-events
  name: sensor-terminal-shell-container-sa
---
# Similarly you can use a ClusterRole and ClusterRoleBinding
apiVersion: rbac.authorization.k8s.io/v1
kind: ClusterRole
metadata:
  name: sensor-terminal-shell-container-role
  namespace: argo-events
rules:
  - apiGroups:
      - argoproj.io
    verbs:
      - "*"
    resources:
      - workflows
      - workflowtemplates
      - cronworkflows
      - clusterworkflowtemplates
---
apiVersion: rbac.authorization.k8s.io/v1
kind: ClusterRoleBinding
metadata:
  name: sensor-terminal-shell-container-role-binding
roleRef:
  apiGroup: rbac.authorization.k8s.io
  kind: ClusterRole
  name: sensor-terminal-shell-container-role
subjects:
  - kind: ServiceAccount
    name: sensor-terminal-shell-container-sa
    namespace: argo-events
EOF
And now we deploy our Sensor.
cat <<EOF | kubectl apply -n argo-events -f -
apiVersion: argoproj.io/v1alpha1
kind: Sensor
metadata:
  name: terminal-shell-container
  namespace: argo-events
spec:
  template:
    serviceAccountName: sensor-terminal-shell-container-sa
  dependencies:
    - name: falco-event
      eventSourceName: webhook-falco
      eventName: falco-event
      filters:
        data:
          - path: body.rule
            type: string
            value:
              - "Terminal shell in container"
  triggers:
    - template:
        name: delete-pod-trigger
        argoWorkflow:
          group: argoproj.io
          version: v1alpha1
          resource: workflows
          operation: submit
          parameters:
            - src:
                dependencyName: falco-event
              dest: spec.arguments.parameters.0.value
          source:
            resource:
              apiVersion: argoproj.io/v1alpha1
              kind: Workflow
              metadata:
                generateName: delete-pod-
                namespace: argo
              spec:
                workflowTemplateRef:
                  name: delete-pod-template
                arguments:
                  parameters:
                    - name: falco-event
                      value: {}
EOF
Creation of the Workflow Template
There is one piece missing in our Argo stack, we mentioned a template above, we logically need to create it too, with the service account it needs.
cat <<EOF | kubectl apply -n argo -f -
apiVersion: v1
kind: ServiceAccount
metadata:
  name: delete-pod-sa
  namespace: argo
---
kind: ClusterRole
apiVersion: rbac.authorization.k8s.io/v1
metadata:
  name: delete-pod-sa-cluster-role
rules:
  - apiGroups: [""]
    resources: ["pods"]
    verbs: ["get", "list", "delete", "patch", "watch"]
---
kind: ClusterRoleBinding
apiVersion: rbac.authorization.k8s.io/v1
metadata:
  name: delete-pod-sa-cluster-role-binding
roleRef:
  kind: ClusterRole
  name: delete-pod-sa-cluster-role
  apiGroup: rbac.authorization.k8s.io
subjects:
  - kind: ServiceAccount
    name: delete-pod-sa
    namespace: argo
EOF
cat <<EOF | kubectl apply -n argo -f -
apiVersion: argoproj.io/v1alpha1
kind: WorkflowTemplate
metadata:
  name: delete-pod-template
  namespace: argo
spec:
  entrypoint: delete-pod
  serviceAccountName: delete-pod-sa
  arguments:
    parameters:
      - name: falco-event
        value: "{}"
  templates:
    - name: delete-pod
      inputs:
        parameters:
          - name: falco-event
      container:
        image: devopps/kubernetes-response-engine-based-on-event-driven-workflow@sha256:22ee203a33fe88f0f99968daebdcea0ca52c8a3d6f7af4c823ed78ac15b7c5db
        env:
          - name: BODY
            value: "{{inputs.parameters.falco-event}}"
EOF
Argo Workflow runs all workflow steps inside their own pods, we'll use for this tutorial a Golang image developped by @developer-guy (who wrote the Part 2 of this series 😄), the sources are there.
At this stage, everything is ready to receive events from Falco and protect our cluster.
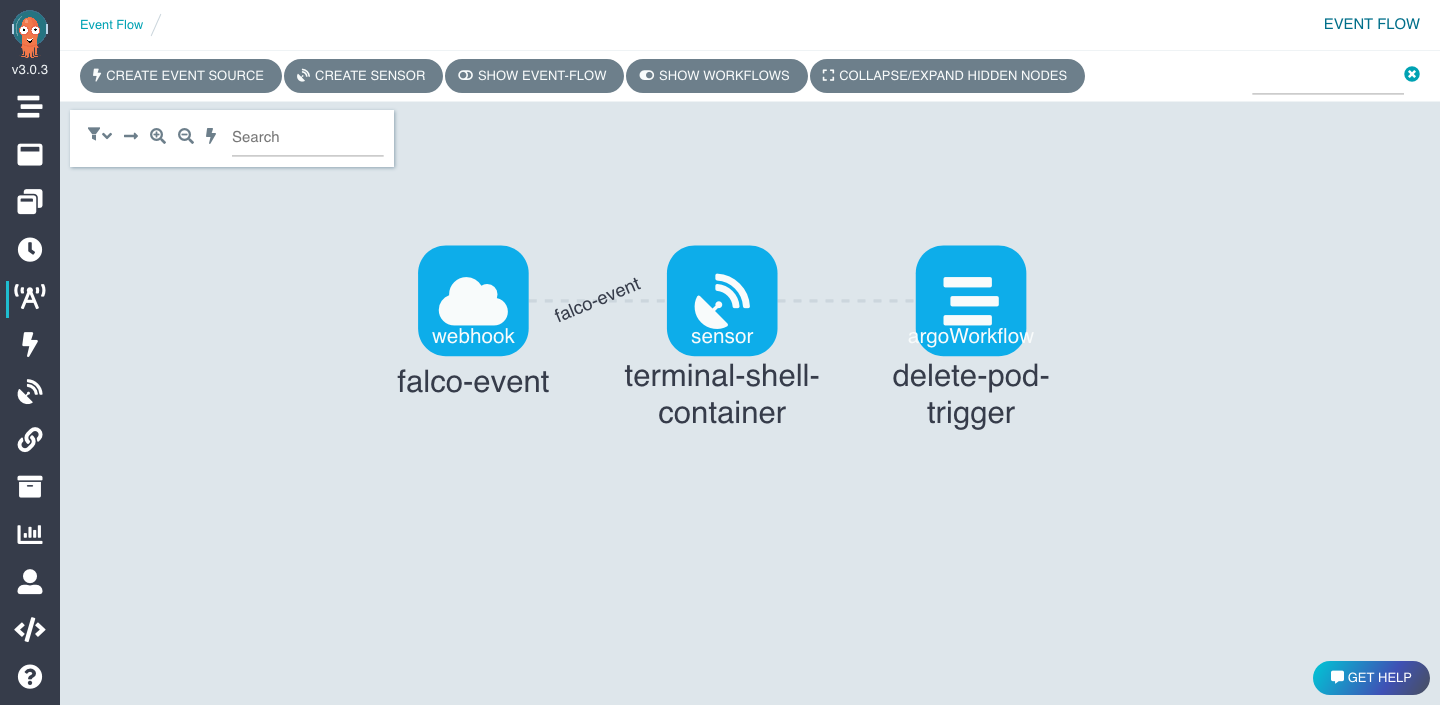
If you go in Argo Workflow UI you will find the architecture we described at beginning.
Installation of Falco and Falcosidekick
Last but not least, it's time to install our beloved Falco and Falcosidekick and connect them to our shiny new Response Engine.
As with other posts of this series we'll use Helm as conveniant installation method.
kubectl create ns falco

helm repo add falcosecurity https://falcosecurity.github.io/charts

helm install falco falcosecurity/falco \
  --namespace falco \
  --set falcosidekick.enabled=true \
  --set falcosidekick.config.webhook.address=http://webhook-falco-eventsource-svc.argo-events.svc.cluster.local:12000/falco
Remember the service we "mentioned" earlier? This is it in its FQDN format as an endpoint.
Test our Response Engine
Let's delete pwned pod !
We'll simulate a webshell by executing a shell command into a running pod.
kubectl run alpine -n default --image=alpine --restart='Never' -- sh -c "sleep 6000"

kubectl get pods -n default
NAME     READY   STATUS    RESTARTS   AGE
alpine   1/1     Running   0          8s
Run a shell command inside.
kubectl exec -i --tty alpine -n default -- sh -c "uptime"

 22:03:23 up 44 min,  load average: 0.07, 0.13, 0.19
If you're quick enough, you may see the termination of the pod.
kubectl get pods -n default
NAME     READY   STATUS        RESTARTS   AGE
alpine   1/1     Terminating   0          8s
And in Argo Workflow UI.
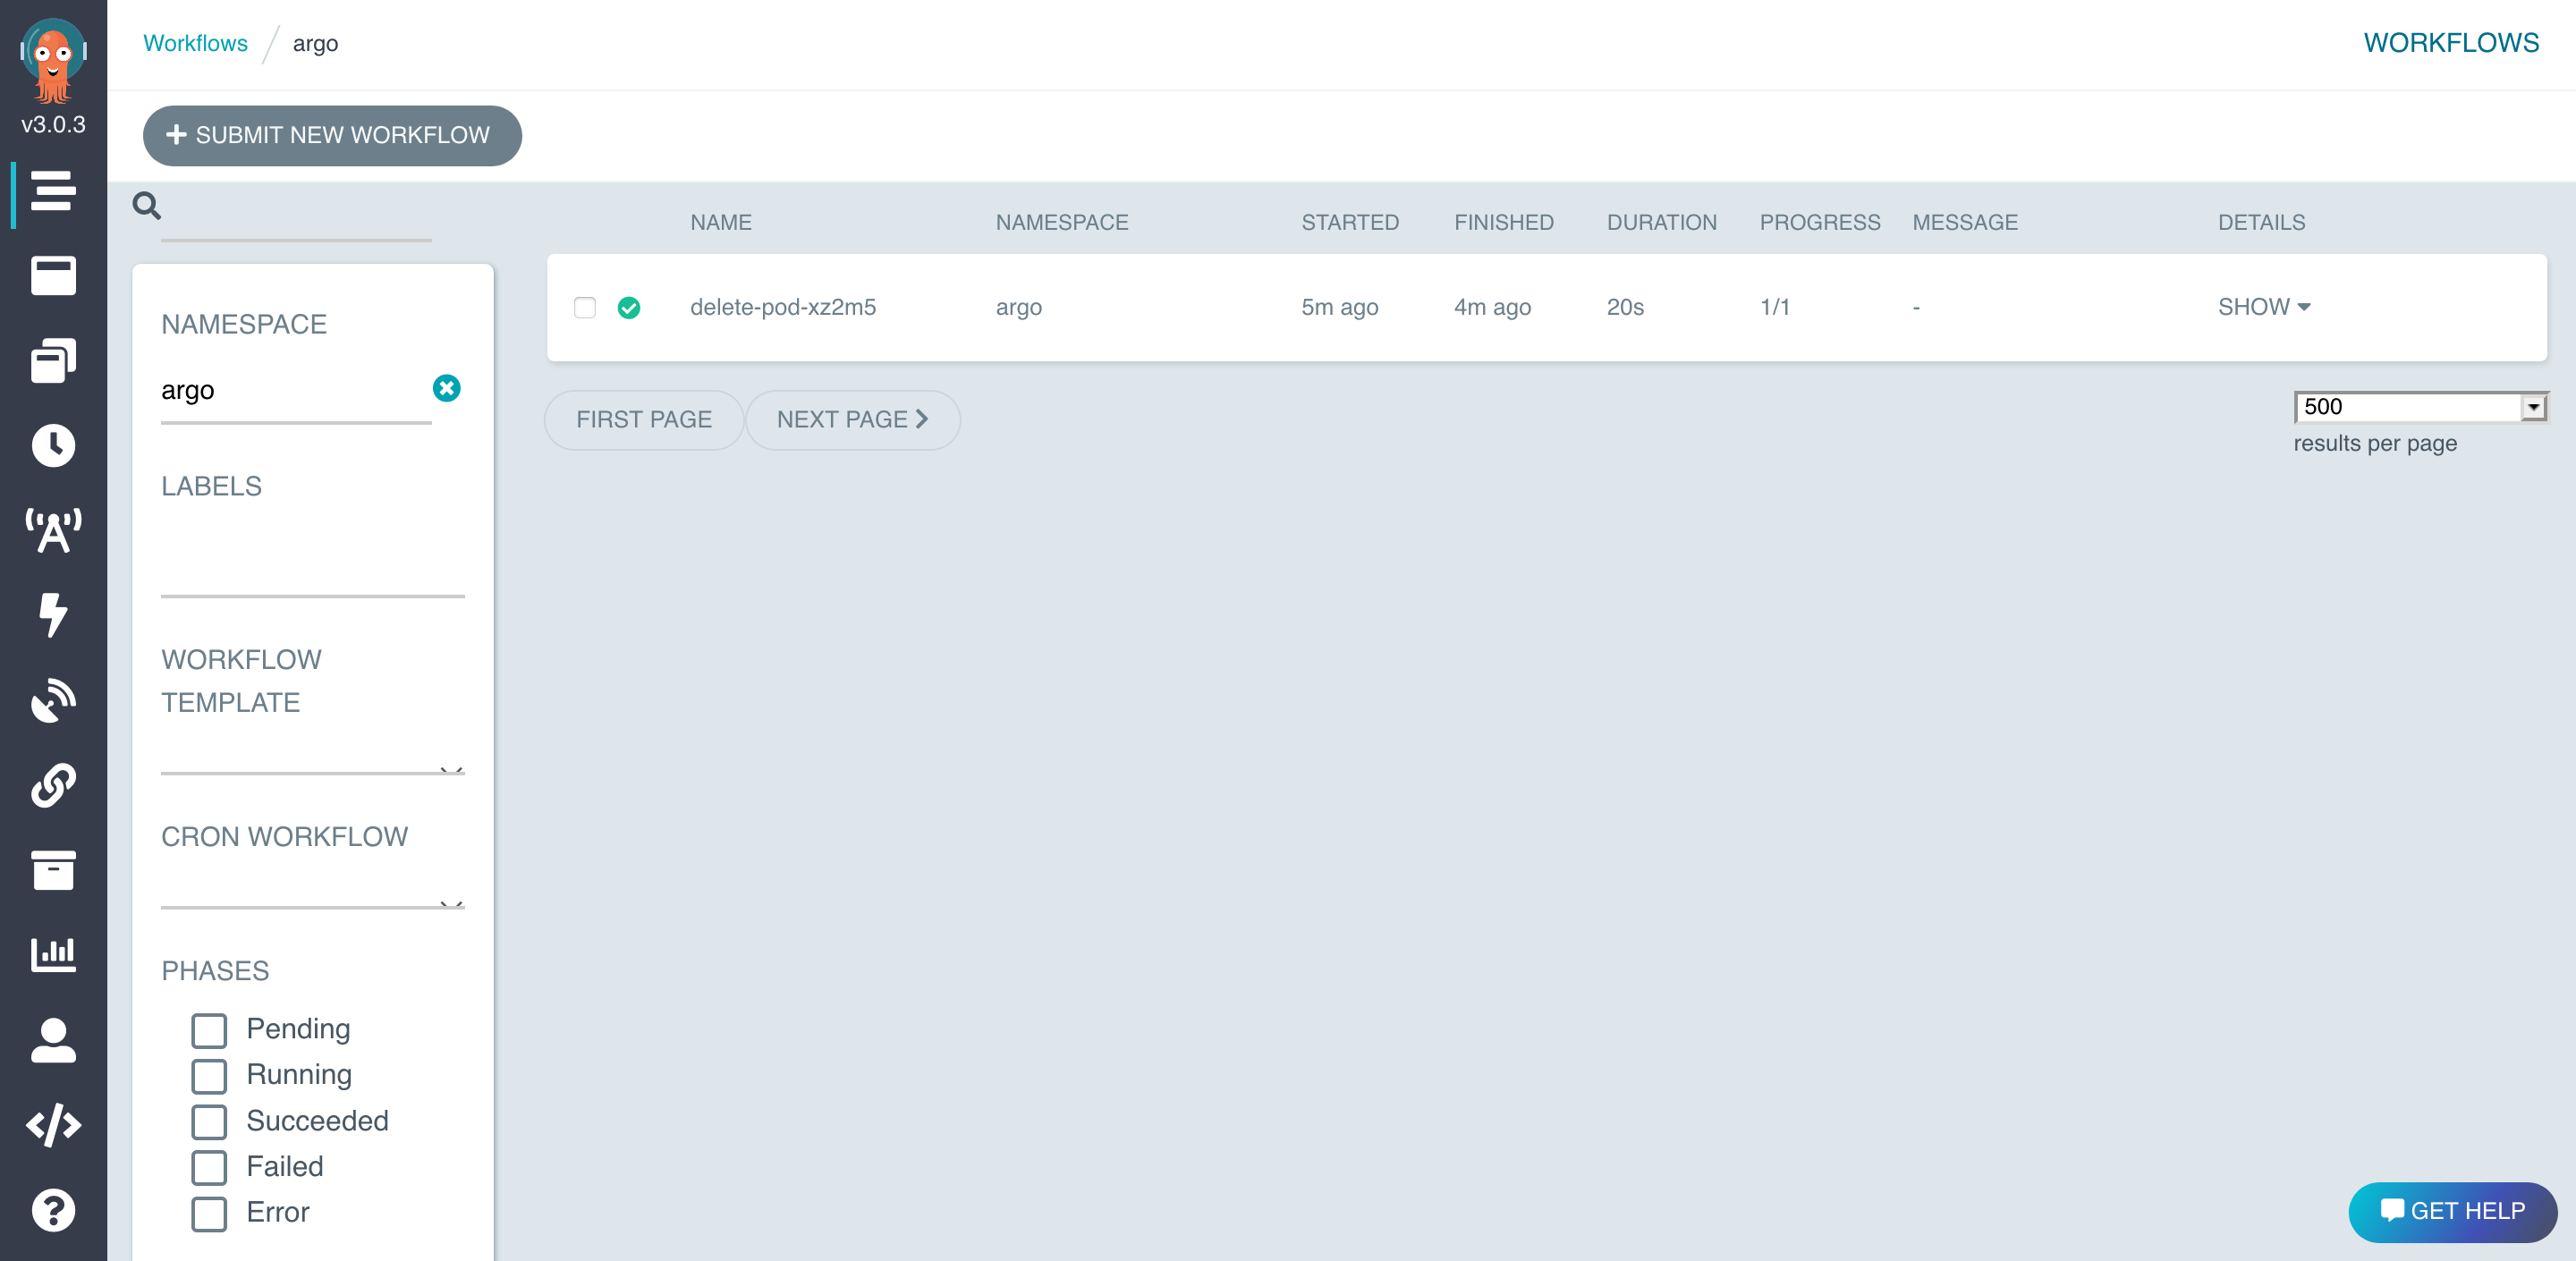
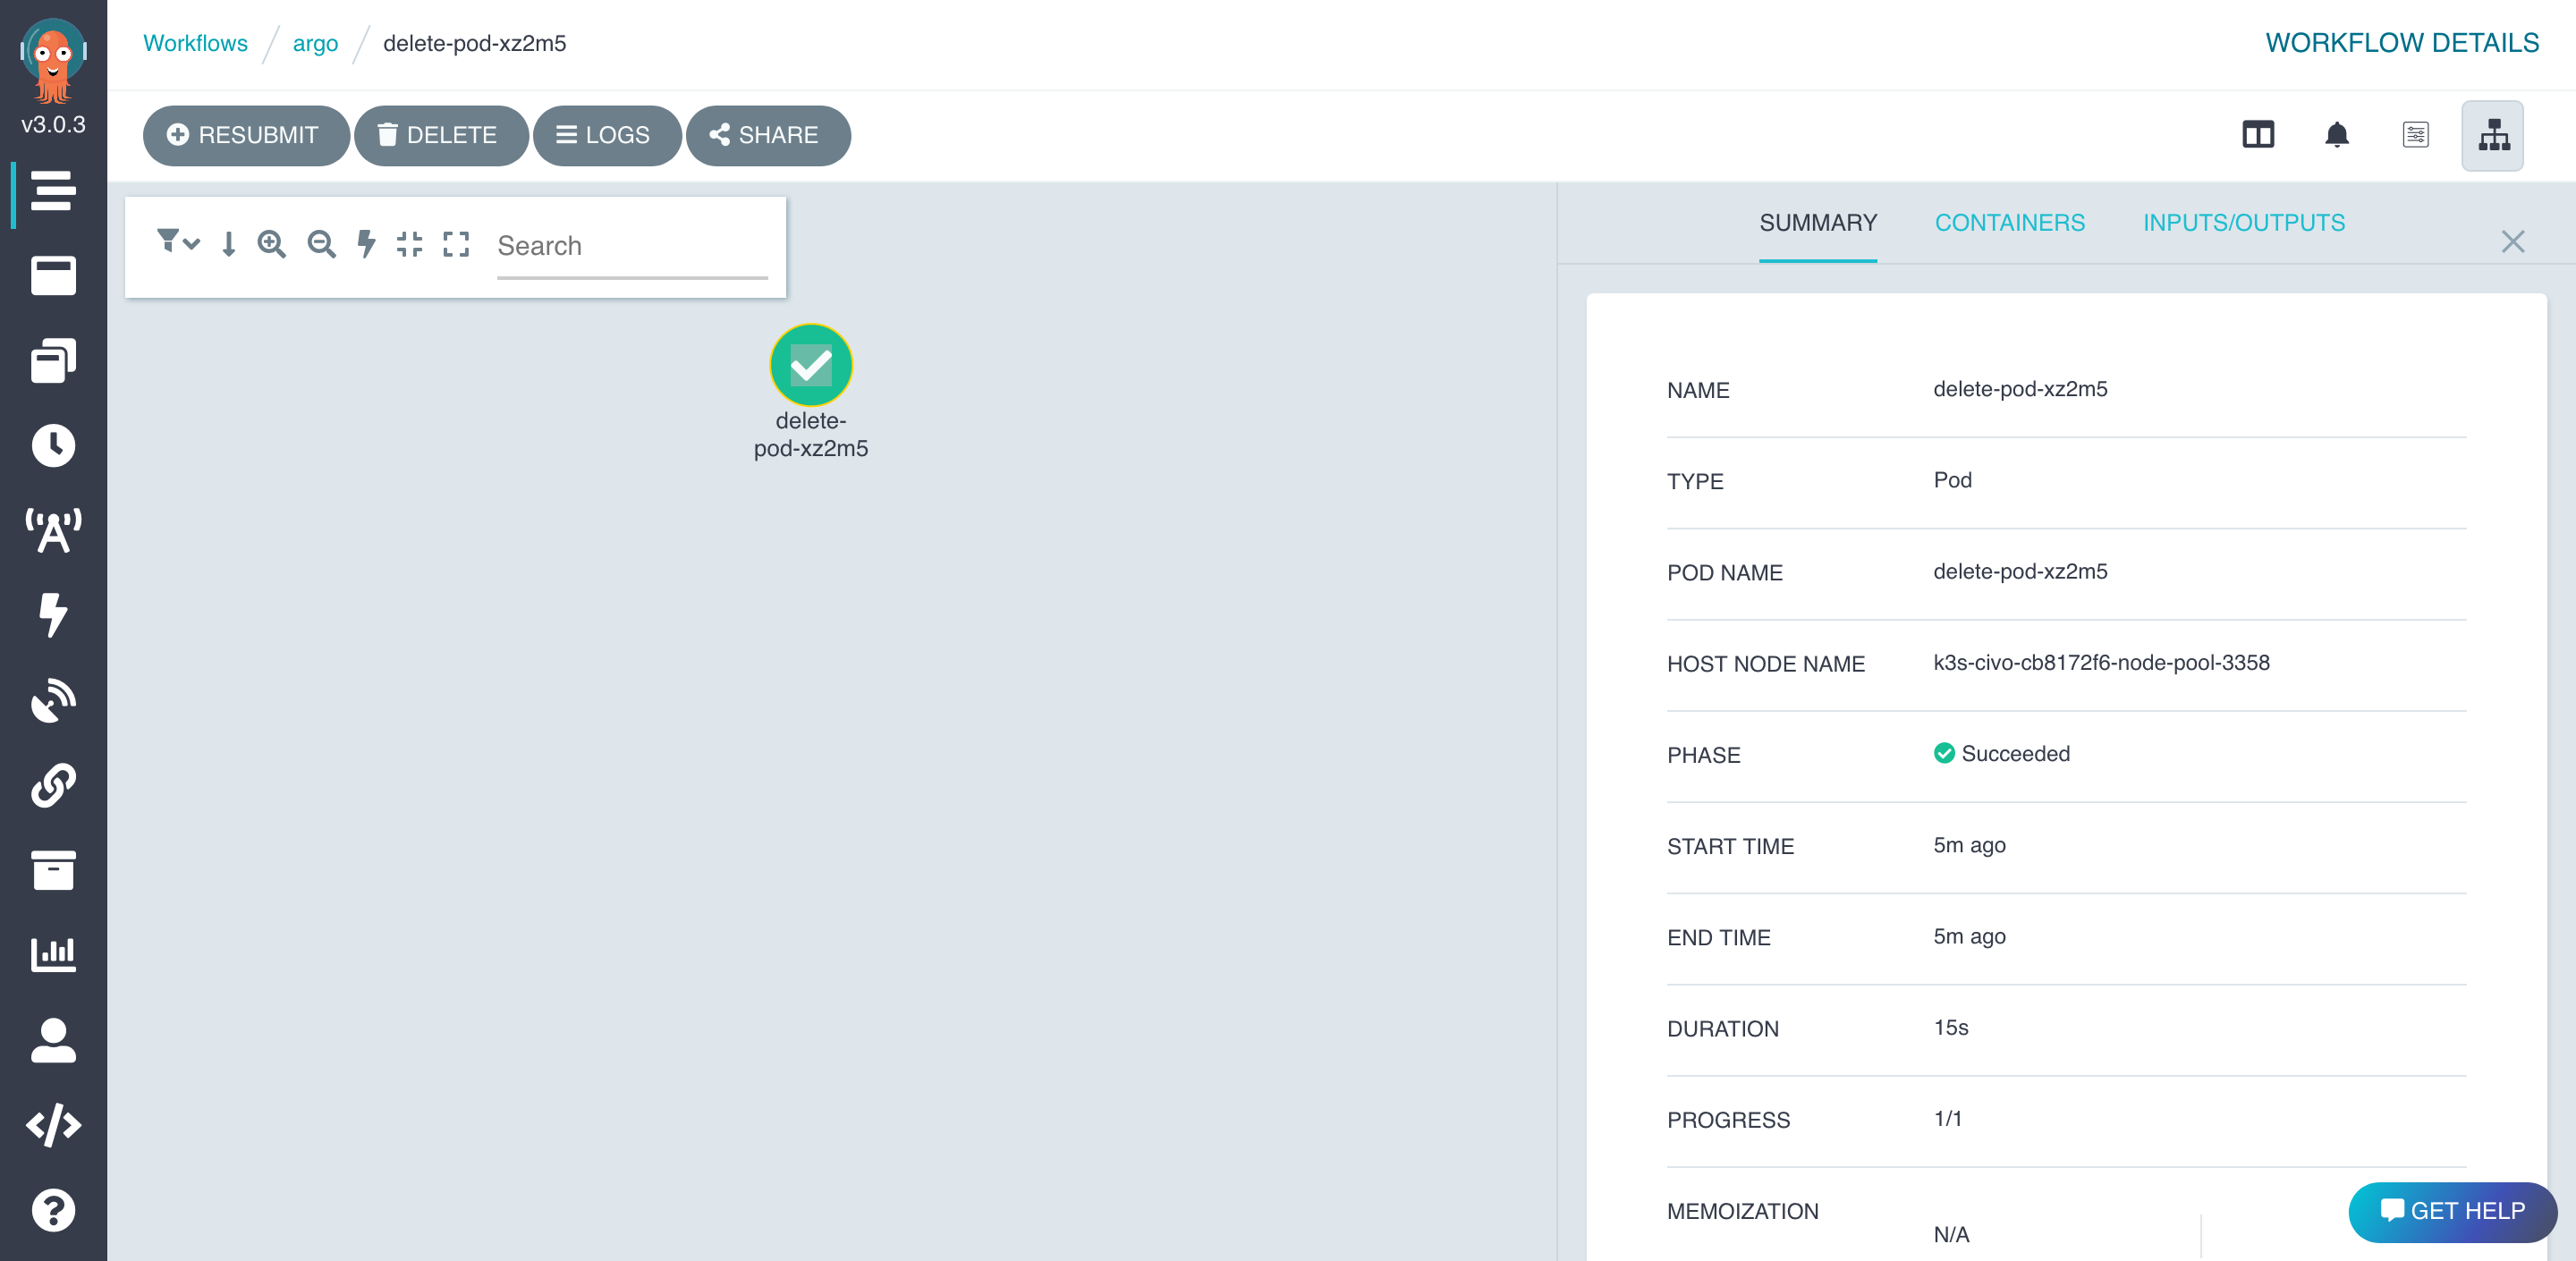
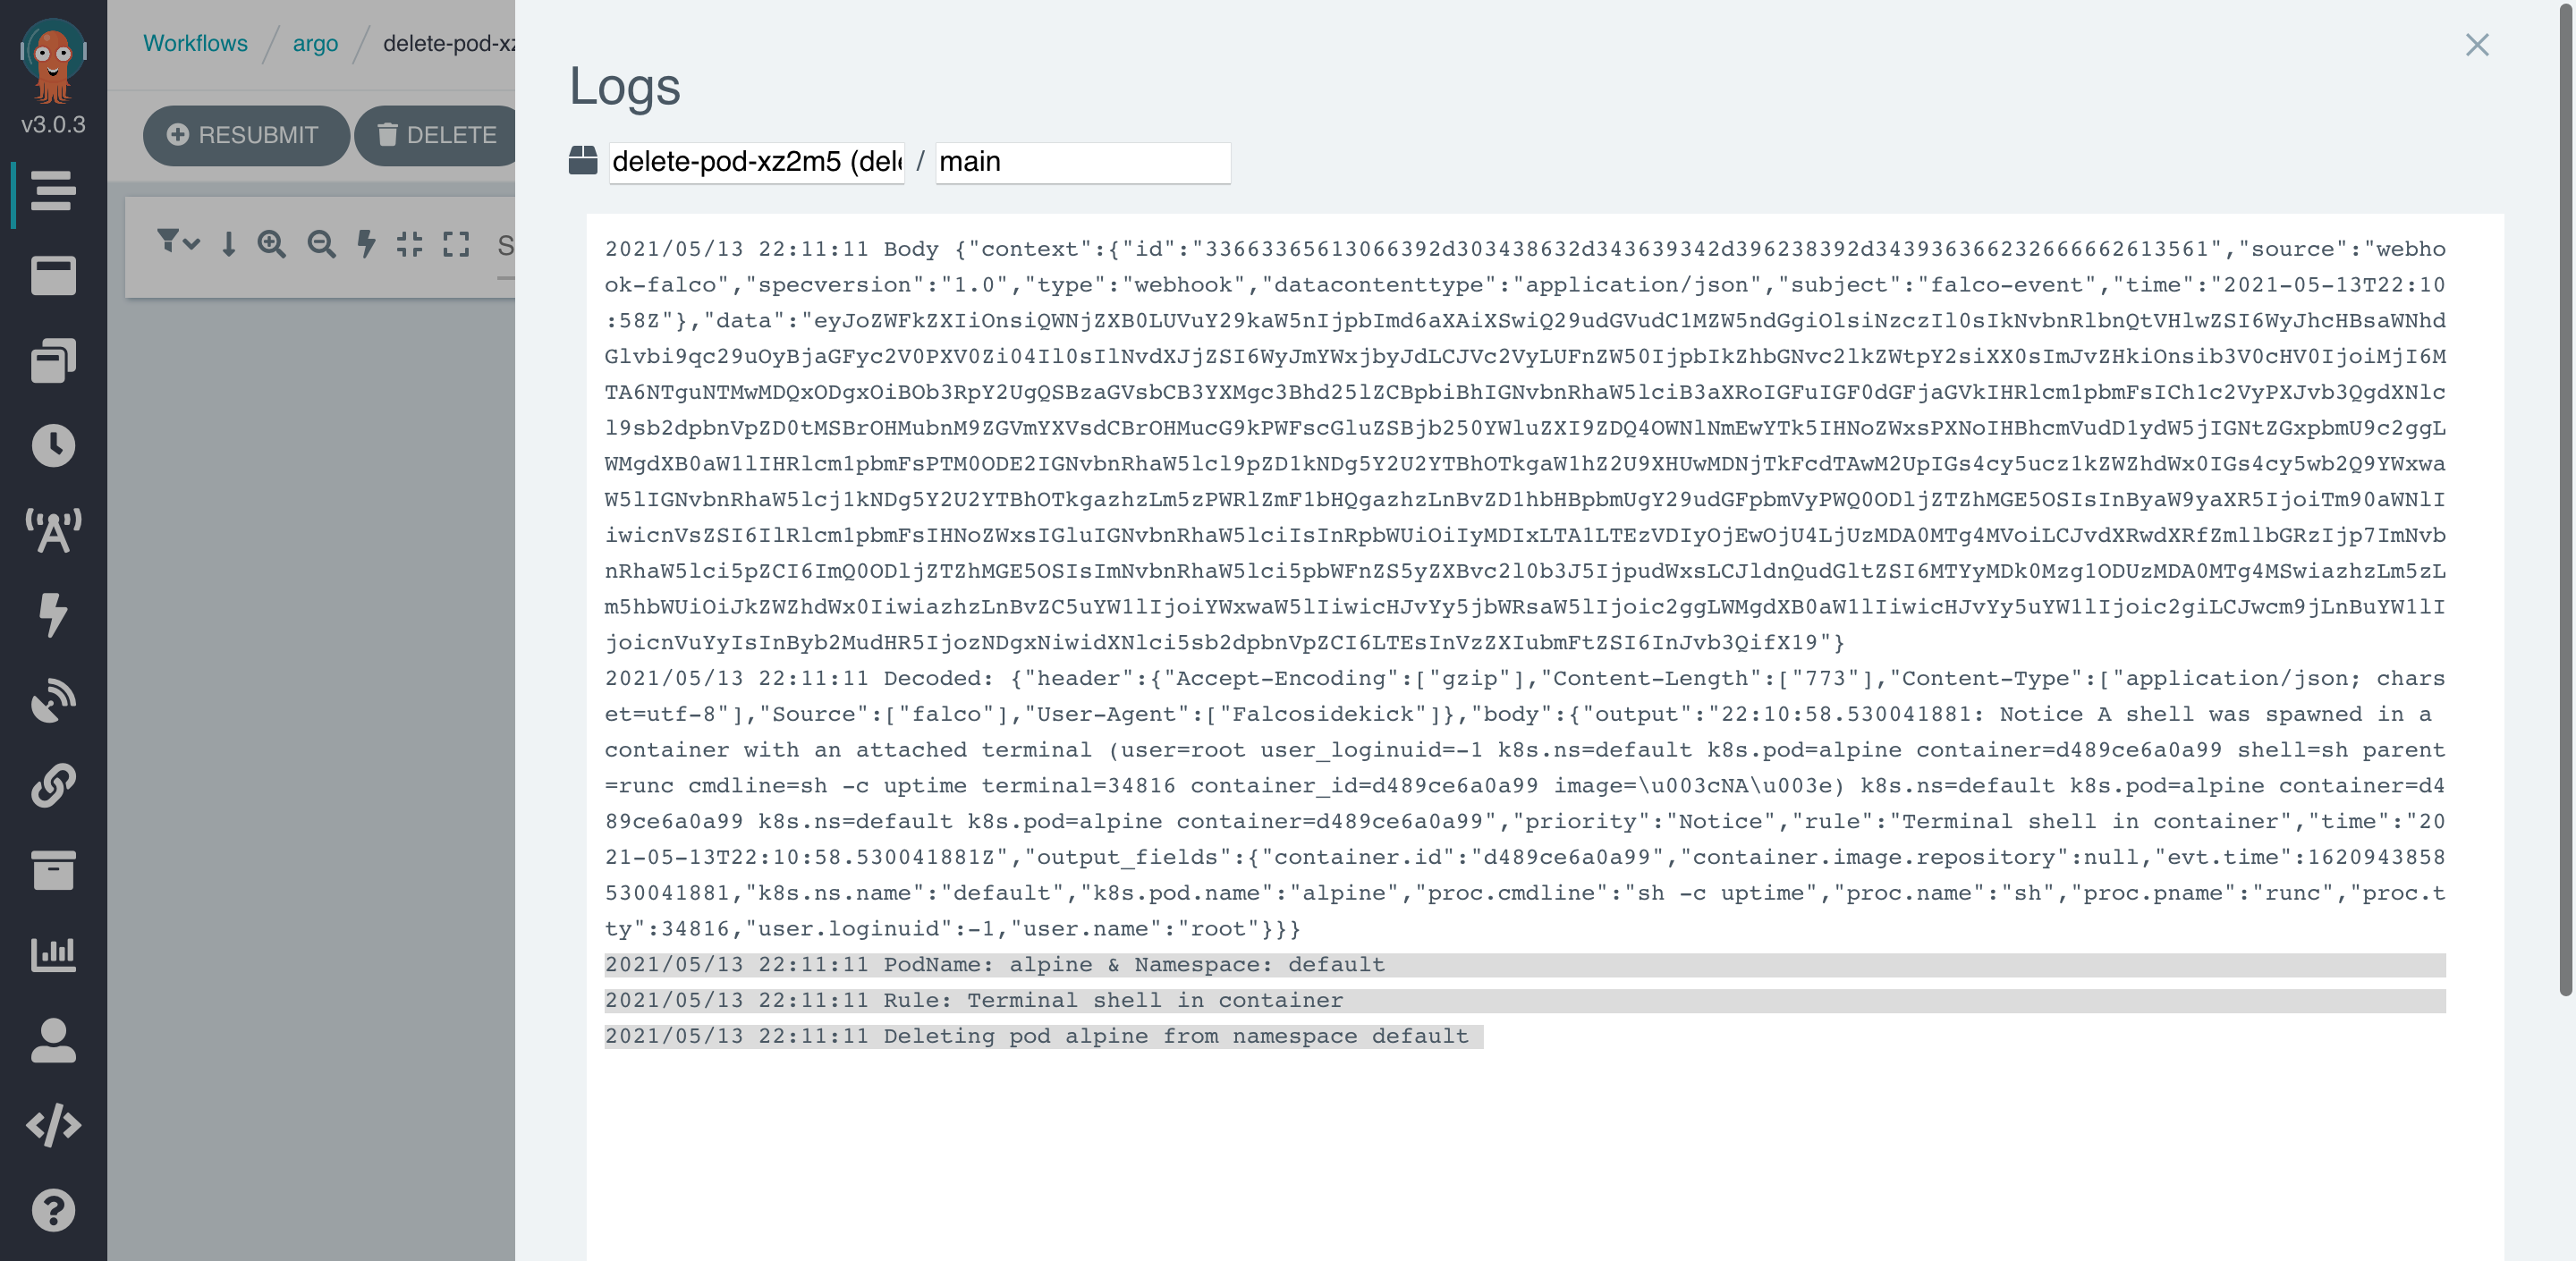
👍
Go a little further with Argo
We can even go further by deploying all components with Argo CD, another project from Argo team.
You can find out all you need in this repo.
Here a quick demo of the results with the exact same workflow we just created in this tutorial.
Conclusion
We got another way to create a Response Engine with amazing pieces of software from Open Source world. Of course, it's just the beginning, feel free to share your functions and workflows with the community for starting the creation of a true library of remediation methods.
If you would like to find out more about Falco:
- Get started in Falco.org.
- Check out the Falco project in GitHub.
- Get involved in the Falco community.
- Meet the maintainers on the Falco Slack.
- Follow @falco_org on Twitter.
